How to Make a Baby Memory Blanket


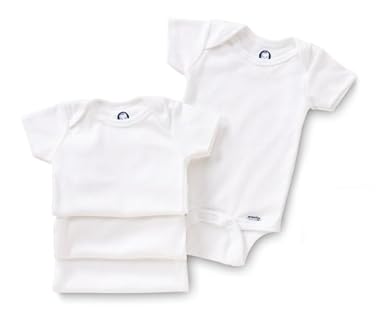
Making a baby clothes quilt is such a wonderful way of preserving those cute baby clothes that were a gift from special friends or family members or even something really special you bought for your new baby. Most of these clothes haven't really been worn out as they are used for such a short time. Put some thought into it ahead of time by taking some pictures of your baby in some of the outfits you will be using in the baby clothes quilt and using the pictures to incorporate into the quilt or on the label that you might want to attach to this keepsake.
Planning Your Baby Memory Blanket
Clothes to use: Start with clean items. Besides the baby clothes you can use bibs, caps, socks, Halloween costumes, blankets, linens, special curtains and nursery items.
Quilt Sizes: Decide how large of a baby clothes quilt you would like. It can be as small or large as you would like.
28"x 28" quilt will take about 20 articles of clothing 36"x 36" quilt will take about 30 articles of clothing 50"x 60" quilt will take about 50 articles of clothing Twin size quilt will take about 70 articles of clothing
Quilt Backing: When you have gathered the articles that you would like in the quilt, lay them out and you should be able to see a prominent or favorite color that can be used for the backing of the quilt. I would suggest either fleece or flannel. Add an additional 3" onto your figure for each side to make sure that you will have enough fabric to turn over for the edging. If you will be using a separate edging you could get by with less. (Fleece comes in a 60" width, flannel 44" width)
Cutting the clothing: Most of the articles should be ironed (without stretching it) to get an accurate cut. First take a scissor and cut out as much of the flat area of the article that you want to use on the quilt. Next lay this piece of material on your cutting board and cut out a square or rectangular piece. Then sort these pieces into same sized piles. Sew these similar sized pieces into a horizontal row (as wide as your quilt will be). Next put this row on your cutting board and trim the top and bottom edge so they are straight. Iron the seams open.
Lay out of the quilt: Lay the quilt backing out on a flat surface (such as a bed) and then place the rows sewn together on top of it. This way you can visually see how long to make your rows and also see how you would like to arrange these rows. After you have decided - sew these rows together. Iron the seams open.
Quilting Your Baby Memory Blanket
Applique: Adding a name to this baby clothes quilt can be done at this time by appliqueing the letters directly on top of the clothing or appliqueing the name on a strip of material and then sewing the strip between your rows.
Squaring the quilt: After the pieces have been sewn together take a couple of measurements on the upper half and lower half of your quilt. They should be the same. Also take a couple of measurements the other direction. If they are the same you should have an evenly proportioned quilt.
Quilting your blanket: Place your quilt top on your backing trying to make sure that the seam (that you ironed open) are laying open on your backing. Place safety pins about 6 inches apart all over the quilt. Then quilt by either the tying or machine quilting method. This will keep your quilt top and quilt backing together.
Embellishments: Now is the time to add some of the special items like hats, socks and bibs. Either attach them by hand or machine stitching them on.
Edging: Decide how much of an edge you would like around the quilt. For flannel trim the backing to 2inches from the quilt edge to be folded over twice making a 1inch finished edging. For fleece trim the backing to about 1.25 inches from the quilt edge to be folded over into a 1inch finished edge. Fold the sides of your edging over first and sew it down with a straight stitch or use a decorative stitch. Next fold the top and bottom edges over making sure your corners are squared off. Then sew these edges down. Another way this could be done is to cut off your backing even with the top of your quilt edge. Using this method, you can sew on a separate edging such as satin blanket edging. These are especially nice to use on baby clothes blankets that are 40"x 40" or small as that is the amount of satin edging that comes in a package.
Quilt label: A quilt label can have important information related to why and when (date) this baby clothes quilt was made. Labels can be different shapes such as a heart, square or oval. Include a picture of the infant possibly wearing one of the outfits that are on the quilt. Choose a spot on the backside of the quilt to put your label. Hand or machine stitch it to the quilt.
Enjoy: You know there will be a smile on the face of the recipient of this baby clothes quilt keepsake!
How to Make a Baby Memory Blanket

Infant Onesies
How to Make a Baby Memory Blanket
Infant Onesies
